A real editor walkthrough
How to make bottle labels online
The useful order is physical first, visual second: measure the bottle, choose the label's job, build a readable design, inspect it on the container, run print checks, and test one exact-size sheet.
· 10 minute guide
Make a bottle label as you follow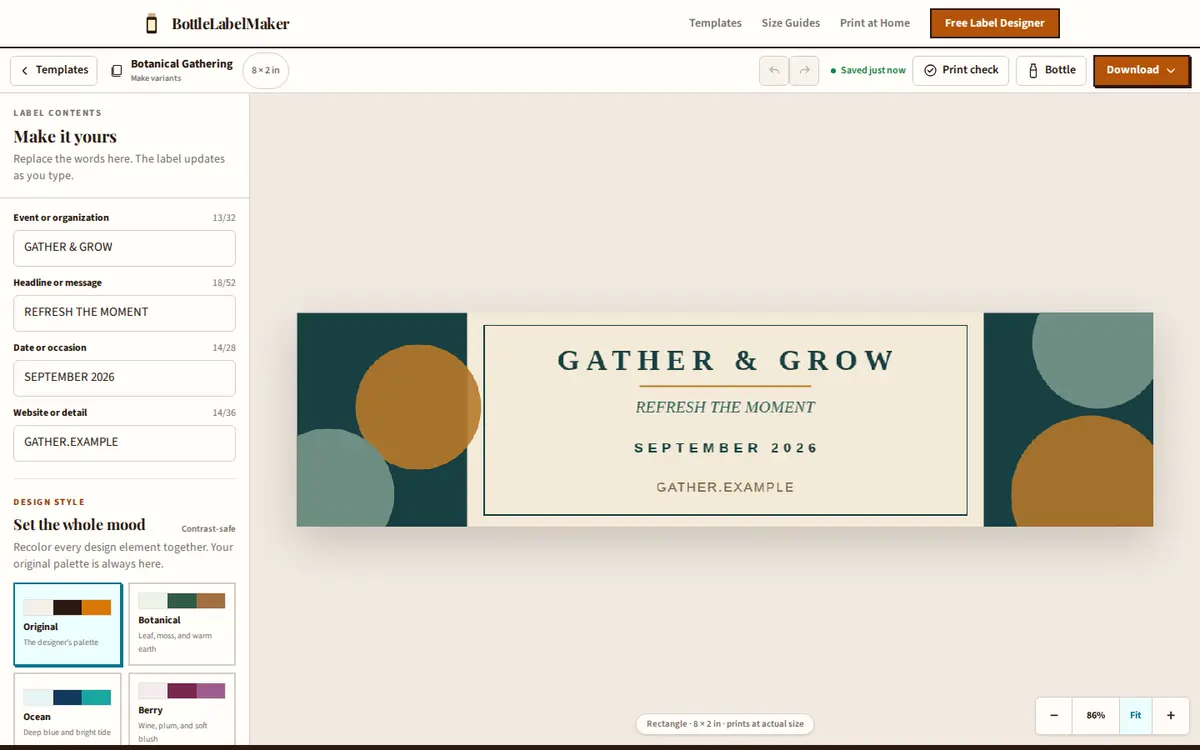
The short answer
Seven steps, one physical test
- 1. Measure the exact bottle
- 2. Choose front, back, or wrap
- 3. Plan the visible hierarchy
- 4. Start from a useful design
- 5. Edit at the final dimensions
- 6. Bottle-proof and preflight
- 7. Export and test at 100%
Measure the bottle that will receive the label
Bottle volume is not a label dimension. Two containers that hold the same amount can have different shoulders, seams, ridges, tapers, and smooth panels.
For a front label, measure only the usable flat width and straight height. For a wrap, circle the body with a paper strip, mark the circumference, then decide how much clear seam you want between the ends. Keep the label away from any change in diameter that could crease it.
Cut that rectangle from ordinary paper and hold it on the bottle. Mark which portion faces forward. This establishes the canvas, the visible face, and the seam before design choices can distract you.
Calculate a measured starting size →Choose the label's job and starting shape
A front label presents identity. A back label carries the next layer of information. A wrap has a front-facing center plus edges that turn toward a seam. Pick the structure before arranging words, and use a separate back label when one face cannot stay clear and readable.
Beer and cider
Front labels, round medallions, 12 oz bottles, and batch details
Open the guide →Wine and spirits
Tall front labels, oval designs, vintages, and matching back labels
Open the guide →Water-bottle wraps
Measured circumference, front-face planning, seam, and condensation
Open the guide →Two-sided sets
One visual system with different jobs on the front and back
Open the guide →Plan what must be visible first
Write the label's content before decorating it. Give the identity the most space: product or event name first, one supporting line second, and details third. If every line shouts, nothing leads.
On a wrap, keep the identity and any QR code in the marked front-facing zone. Let repeatable pattern, color, or quiet supporting copy travel around the sides. On a small front label, move longer instructions or stories to a companion back label.
Commercial label content depends on product and market. The editor can assess visual readiness, but it cannot decide which regulated statements belong on your package.
Maker or event
MAIN IDENTITY
One supporting line that gives the identity meaning
Date · variety · volume · useful detail
Start with real dimensions and your own words
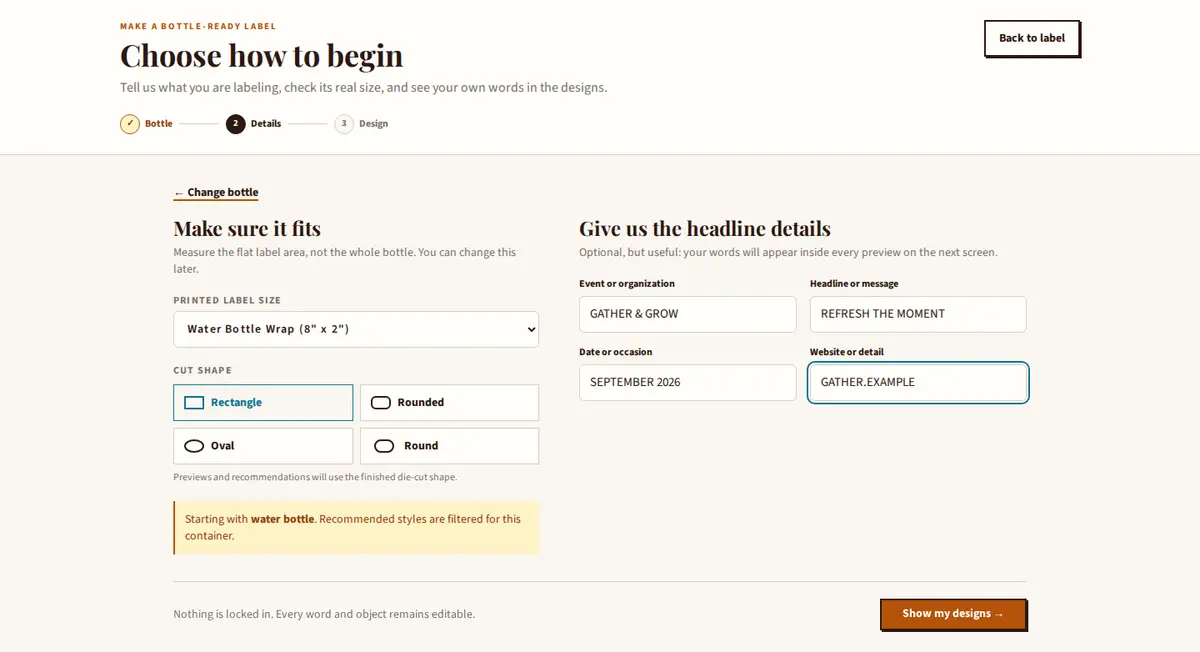
In the editor, choose the bottle profile, confirm a preset or custom measured size, select a cut shape, and add the headline details. Those words appear inside the design choices before you commit, so you can judge the composition rather than a generic thumbnail.
Edit the label at its final proportions
Replace the meaningful words first. Then choose a visual direction and adjust only what improves hierarchy: type scale, spacing, contrast, alignment, and one or two recognizable graphic ideas.
Keep logos at their natural proportions. Avoid stretching raster artwork, and watch the printed-size resolution result rather than the image's pixel count in isolation. A large file can still become soft if enlarged too far.
Use Undo freely. Whole-label palette and typography directions remain reversible, and the editor keeps a browser-local autosave while you work. On narrow phone screens, Undo and Redo sit beside Contents above the label; on larger screens, find them in the top bar.
Add one original illustration, then leave it room
Open Artwork, background & illustrations → Elements → Illustrations to choose from 12 original motifs across brewing, wine, kitchen, and celebration. Set an ink and accent color—or use one ink—then resize proportionally. One clear motif usually supports the name better than several competing decorations.
The motif remains part of the editable project and its .blm backup. Full-resolution PNG and PDF exports render the artwork at 300 dpi, so proof the final size before a larger run.
See it on a bottle, then run the print checks
Bottle proof answers a visual question: does the identity sit where you expect, and does a wide design behave like a wrap? Enter your own circumference and straight-wall height to turn the starting estimate into a more useful fit report.
Print check looks for a different class of risks: missing content, objects outside trim, essential text outside the safe area, very small type, weak or uncertain contrast, low-resolution uploads, and common QR or barcode geometry problems.
Neither view replaces a physical proof. The bottle image is not a calibrated simulation of your exact container, material, adhesive, ink, or screen-to-print color.
Make a mockup on a preset or your own bottle photo →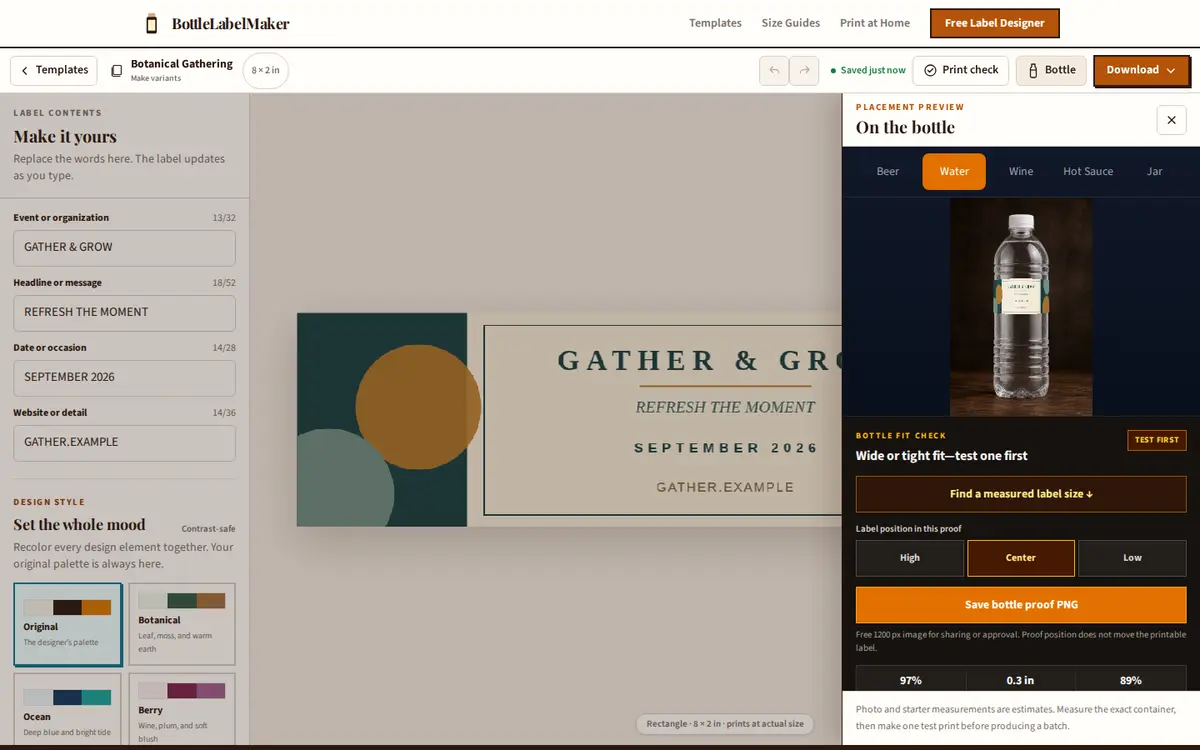
Returning to work
Return in the same browser, or carry a backup with you
Name the project and return to it from Projects when you use the same browser profile. Projects are browser-local, not synced to an account or cloud; browser cleanup and private browsing can remove them. Projects retain up to 10 earlier committed versions while they remain in that browser.
For another device or a separate safety copy, download the editable .blm backup. Importing it creates a new project and leaves existing projects untouched. The backup contains the current project's labels and imported artwork, not recent version history or a private bottle-proof photo.
Export the right file and print one scale test
Downloading is not the final check. Print one plain-paper copy, choose Actual Size or 100% in the printer dialog, turn off Fit, Shrink, or Scale, and measure the result with a ruler. Wrap that paper around the bottle before loading label stock.
Full-resolution PNG
A clean 300 px-per-inch design file for a print service, another layout tool, or your own archive.
Full-sheet actual-size print sheet
A Letter or A4 PDF for full-sheet stock you will cut yourself, with physical dimensions, optional crop guides, and full-sheet bleed.
Pre-cut actual-size print sheet
A verified portrait US Letter PDF for one of the supported pre-cut layouts. Choose an exact matching size and shape; it is not an A4 or automatic-resize option.
Bottle proof PNG
An approval or sharing image: 1200 px wide on preset scenes, or up to a 2400 px long edge on your own photo. It is not the printable label artwork.
Editable .blm backup
A portable copy of the current project, including its labels and imported artwork. Importing creates a new project without changing existing projects; backups do not include recent version history or a private bottle-proof photo.
Need a different name, flavor, date, or number on each label? Use Projects → Manage labels & print files → Personalize a batch → Large print run, then choose a simple list, CSV fields, or a number sequence. The generated rows can go to a verified pre-cut sheet without changing the source design; see the personalized pre-cut printing workflow for its 100-label limit, fixed-cell order, and paper-alignment step.
Pre-mortem
Six predictable failures—and where to catch them
| What goes wrong | Usually caused by | Catch it here |
|---|---|---|
| The label does not fit | Designing from bottle volume or a generic template | Enter a measured width and height; use Bottle fit as a starting check |
| Words are clipped after cutting | Important copy is too close to the trim | Show the safe area and run Print check |
| A logo prints soft | The source image has too few pixels at final size | Review the uploaded-image resolution result |
| A QR or retail code will not scan | The code is too small, distorted, or crowded | Keep its protected area and test the final physical print |
| The seam hides the message | Key copy sits at the ends of a wide wrap | Mark the front face on paper and inspect the bottle proof |
| The printer changes the size | Fit, Shrink, or Scale is enabled | Print the free scale-test PDF at Actual Size or 100% |
Before you begin
Bottle label questions
The editor can remove repetitive setup and catch visible print risks. Your bottle, content, material, printer, and one real test complete the workflow.
- What do I need before making a bottle label?
- Have the exact empty bottle, a flexible paper strip or tape measure, the wording you actually need, and any logo or artwork at the best available resolution. For a commercial product, also gather the current labeling requirements for the product and market before treating the content as final.
- Can I make a bottle label without design software?
- Yes. Bottle Label Maker runs in a modern browser and includes editable starters, named content fields, freeform objects, bottle proofs, print checks, and downloadable PNG and print-sheet files. No desktop design application or account is required.
- How do I know what size bottle label to make?
- Measure the smooth label panel on the exact container. For a front label, record the usable width and height. For a wrap, measure circumference and decide how much gap or deliberate overlap the seam needs. Cut one paper test at that size before buying stock.
- Should I download PNG or PDF for bottle labels?
- Use the full-resolution PNG when a printer or another application needs the design image. Use the full-sheet Letter or A4 PDF when you are printing and cutting sheets yourself. For a supported pre-cut layout, use the verified Letter pre-cut PDF instead. Always confirm the print dialog is set to Actual Size or 100%.
- Does the editor make a label legally compliant?
- No. Print checks cover visual and production risks such as edges, readability, contrast, image resolution, and code geometry. They do not decide which regulated statements your product needs or approve commercial packaging.
The bottle is your first design constraint
Measure once. Design with confidence. Test before the batch.
Use the complete editor, every print check, full-resolution PNG, and actual-size PDF without an account, watermark, or payment step.
Make my bottle label